
Crypto + Web 3 for Creatives
Our crypto course shows you how to code websites that interact with the Ethereum blockchain and smart contracts in a practical, real-world, no-hype, no-BS, ethical way.

Taught by
Rik Lomas


Get access to Crypto + Web 3 for Creatives
- Practical, go-at-your-own pace learning, with help from our industry experts and experienced teachers
- Projects and code that you can alter and include in your own sites and portfolio
- Resources to get you started and going post-course
Your instructor

Rik Lomas
Course structure


Lesson 01
Welcome to the Crypto + Web 3 for Creatives course

Lesson 02
VS Code and running a live server

Lesson 03
Explaining the HTML and CSS

Lesson 04
Installing a digital wallet

Lesson 05
Your Ethereum account and the blockchain

Lesson 06
Adding a script to the HTML page

Lesson 07
Running code on form submit

Lesson 08
Only show the form if the user has a wallet

Lesson 09
Show a message if no digital wallet installed

Lesson 10
Creating a send function

Lesson 11
Passing in the correct amount from the input

Lesson 12
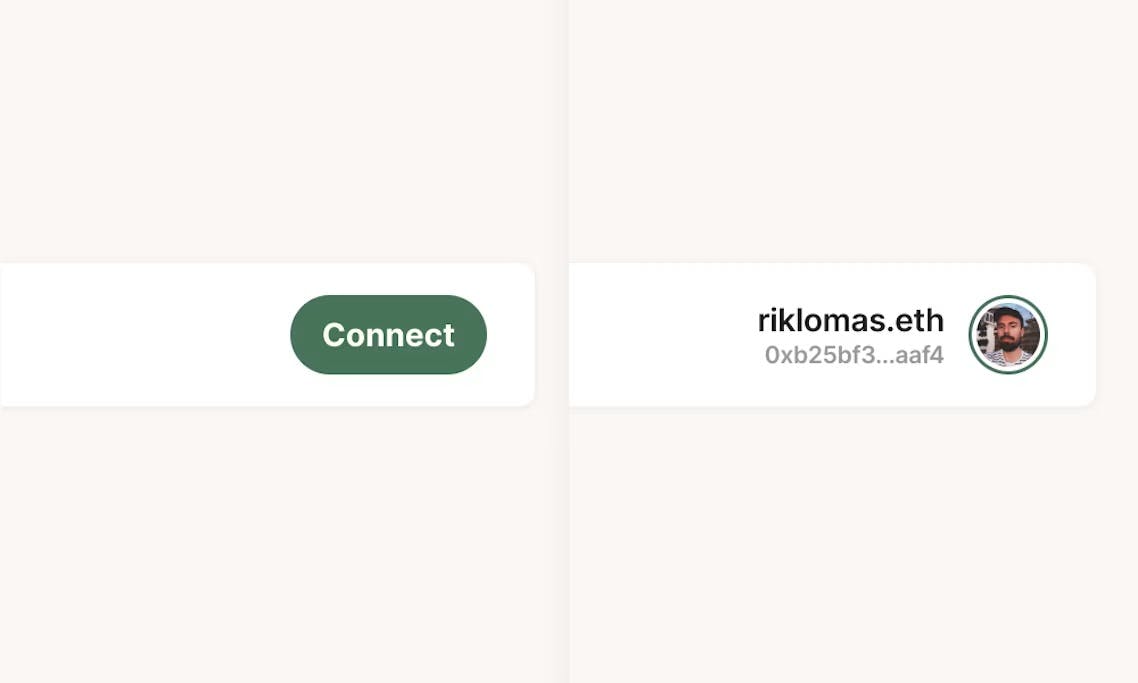
Connecting your site to a digital wallet

Lesson 13
Async and await

Lesson 14
Sending a Ethereum transaction

Lesson 15
Converting from Ether to Wei with web3.js

Lesson 16
Testing with the Ropsten test network

Lesson 17
Testing with the Ganache app

Lesson 18
Next steps!

Lesson 01
Welcome to Potstop

Lesson 02
Setting up our project

Lesson 03
Installing Node.js and Yarn

Lesson 04
Setting up with yarn install and yarn dev

Lesson 05
React components and import from different files

Lesson 06
Passing data into React components

Lesson 07
Changing components based on data

Lesson 08
Connecting to a wallet

Lesson 09
Async and await with a wallet

Lesson 10
useState to hold account information

Lesson 11
Multiple accounts and isLoggedIn state

Lesson 12
Cleaning up the code with useEffect

Lesson 13
useEffect on load only

Lesson 14
Adding an accountsChanged listener

Lesson 15
Off-chain vs on-chain

Lesson 16
Pulling in data by fetching from an API

Lesson 17
Displaying answers and loading state

Lesson 18
Using map to loop over answers

Lesson 19
Adding tipping to each answer

Lesson 20
Hiding the tip button on our answers

Lesson 21
Formatting the addresses

Lesson 22
Adding a Jazzicon for each account

Lesson 23
Adding ENS names

Lesson 24
Adding ENS avatars

Lesson 25
Setting up the answers form

Lesson 26
Signing our data to prove its us

Lesson 27
Next steps!


Lesson 01
Welcome to Prism!

Lesson 02
Setting up the project with Solidity and Truffle

Lesson 03
Initializing the project with Truffle

Lesson 04
Truffle configuration

Lesson 05
Compiling and migrations with Truffle

Lesson 06
A pretend Javascript version of our smart contract

Lesson 07
Setting up total and max sales

Lesson 08
Making information publicly accessible

Lesson 09
Adding public addresses

Lesson 10
Adding a canBuy function to Solidity

Lesson 11
Adding a basic buy function

Lesson 12
Using require in Solidity

Lesson 13
Allow functions to accept Ether
Lesson 14
Splitting payments between owner and charity addresses
Lesson 15
Does the user already have access to the album?

Lesson 16
Using Remix to play with our contract

Lesson 17
Adding Truffle tests to our smart contract

Lesson 18
Testing whether the owner and charity addresses are correct

Lesson 19
Testing whether payments get split between owner and charity
Lesson 20
Adding our smart contract to the front-end

Lesson 21
Connect button

Lesson 22
Accounts on load and on changed

Lesson 23
Run functions on our smart contract

Lesson 24
Send transaction to our smart contract

Lesson 25
Checking whether we have access to the download

Lesson 26
Confirming download access on the back-end

Lesson 27
Deploying to Ropsten test network

Lesson 28
Last things!


Lesson 01
Welcome to Planetary

Lesson 02
Setting up our project

Lesson 03
Setting up Truffle with Ganache
Lesson 04
Using the OpenZeppelin Wizard

Lesson 05
Minting a token

Lesson 06
The _createPlanet function

Lesson 07
Testing our smart contract with Remix

Lesson 08
Setting up with IPFS

Lesson 09
Pinning content with Pinata

Lesson 10
Deploying our contract to Rinkeby

Lesson 11
Using a metadata set standard

Lesson 12
Setting up our web project
Lesson 13
Pulling in the metadata via the token URI

Lesson 14
Adding the OpenSea URL to the button
Lesson 15
Using the OpenSea API

Lesson 16
Showing if the planet is for sale on OpenSea

Lesson 17
Finishing our project

Lesson 18
Variation: Mirror and Arweave

Lesson 19
Variation: Loot project

Lesson 20
Variation: Cryptopunks

Lesson 21
Variation: proofof.network


Lesson 01
Welcome to W-I-P

Lesson 02
Project setup

Lesson 03
Truffle init

Lesson 04
What is a ERC20 contract?

Lesson 05
Adding post and comment thresholds

Lesson 06
Changing the thresholds after deploy

Lesson 07
Adding canPost and canComment functions

Lesson 08
Checking tests with Solidity coverage

Lesson 09
Deploying to Ropsten

Lesson 10
Verifying and publishing the contract on Etherscan

Lesson 11
From contract to website
Lesson 12
Adding a wallet component around every page

Lesson 13
createContext and useContext

Lesson 14
Using useState and useEffect in wallet.js

Lesson 15
Cleaning up code with object destructuring

Lesson 16
The Web3Modal library

Lesson 17
useEffect on web3

Lesson 18
Connecting to the contract

Lesson 19
Fetching the balance on a live contract

Lesson 20
Implementing canPost and canComment

Lesson 21
Using context in other places

Lesson 22
Sending $WIP via a form

Lesson 23
Goverance with tokens
Lesson 24
Swapping and pooling tokens on Uniswap

Lesson 25
The pros and cons of a token-based community

Lesson 26
Thank you!
SuperHi students work at the best
Our students are based all over the world and work at creative companies large and small. Why not check out some of their work?
View student workFeeling stuck?
Don’t worry, we are here to help you with:
- Speedy help from one of our team members
- Detailed, relevant solutions
- Direct access to peer support through Discord!
Remember, there’s no such thing as a silly question, so don’t hesitate to reach out, we love hearing from you!